Migrate a SharePoint list to an existing Dataverse table (via Dataflows)
- Sivakumar K
- Sep 13, 2025
- 2 min read

Updated: Sep 15, 2025
This article explains how to migrate a SharePoint list to an existing Dataverse table.
Pre-requisites:
SharePoint site URL and access to the site/list.
The target Dataverse table already exists (you know its name).
Permissions to create/run Dataflows and write to the table (Environment Maker + Dataverse write access is ideal).
Start
Log in to https://make. powerapps.com
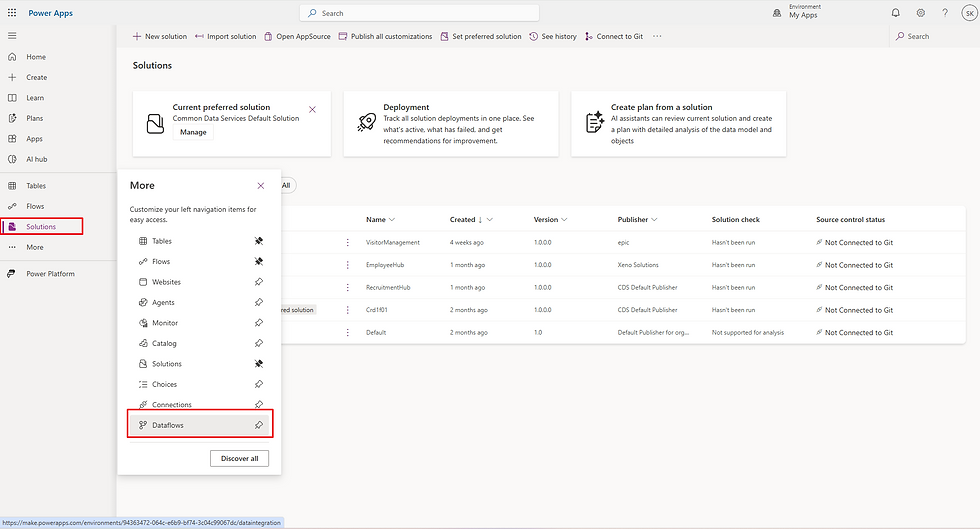
Find Dataflows in the left-hand navigation pane. If you don’t see it, click More to expand the menu—you’ll find Dataflows there, as shown in the picture below.
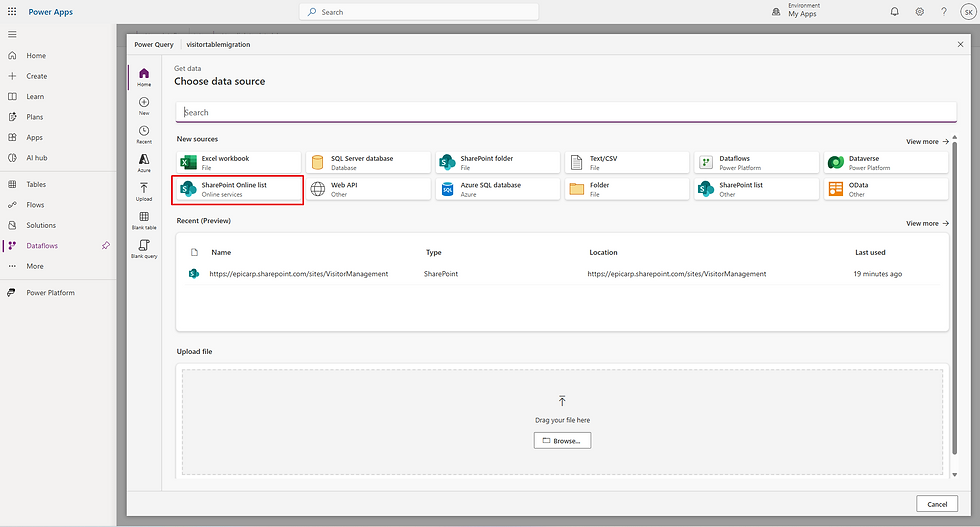
On the next screen, you’ll see a list of data sources. Select the SharePoint Online list.
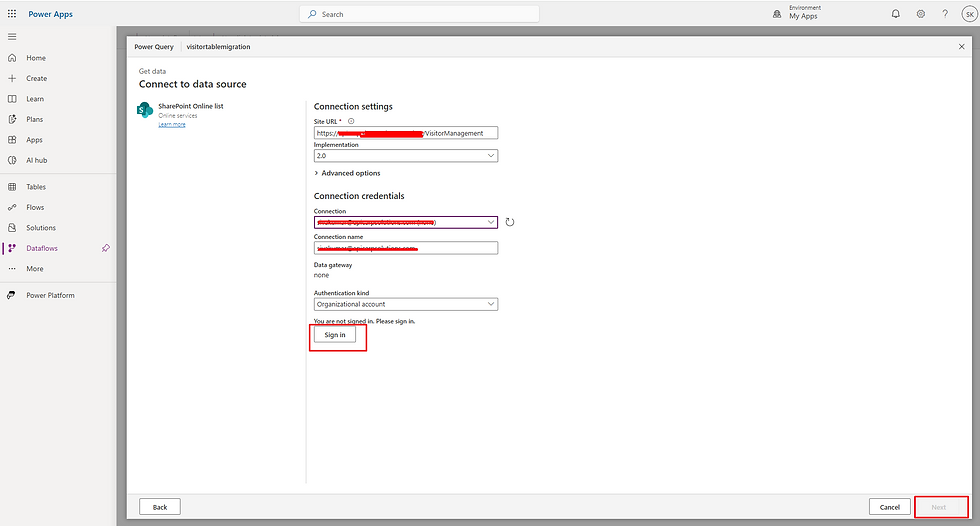
After you select the data source, you’ll be taken to the Authentication screen. Enter your SharePoint site URL, choose Organizational account as the authentication method, and click Sign in to complete the prompt. Once authentication succeeds, the Next button will be enabled—click Next to proceed to table selection.
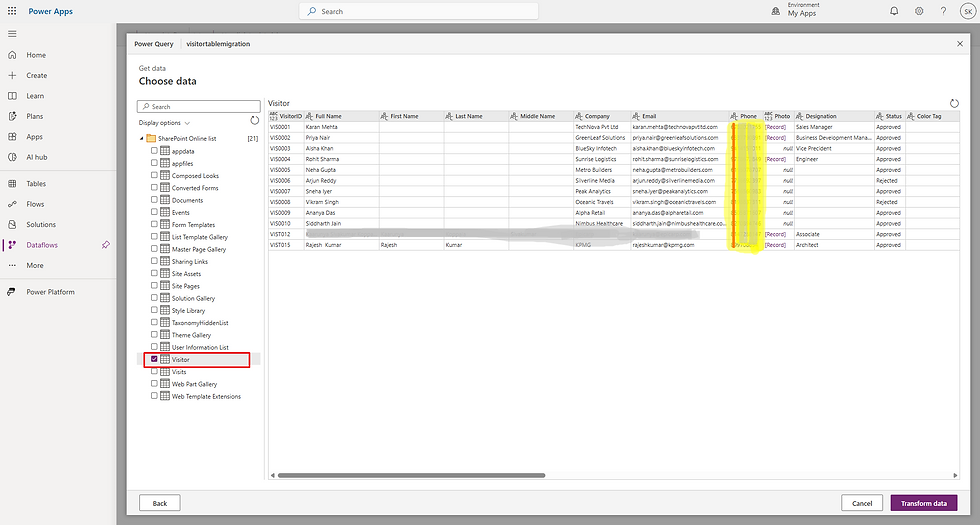
On the Choose data screen, you’ll see your SharePoint lists displayed as tables. Select the checkbox next to the list you want to migrate. A sample preview will appear in the panel (as shown below). Click Transform data.
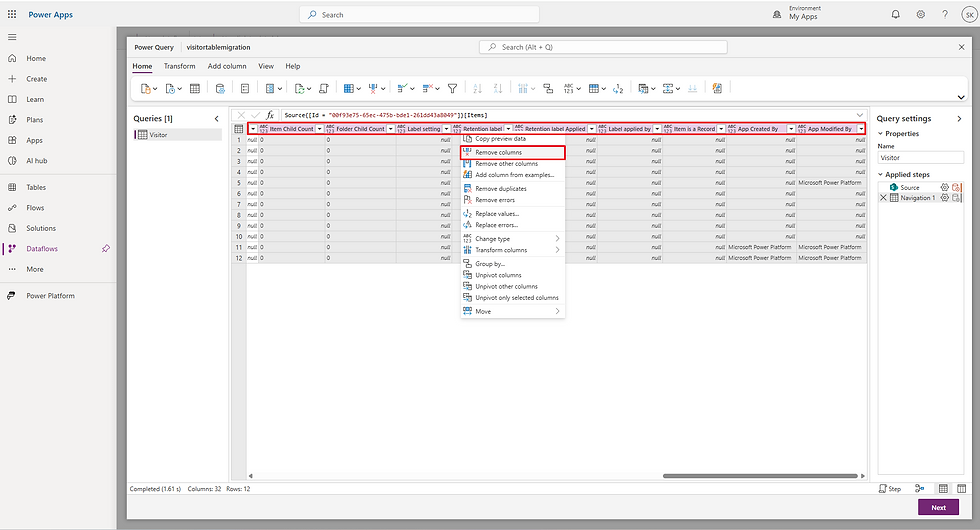
On the Query screen, you’ll see the selected table (e.g., Visitors in my case). It includes both your list’s columns and SharePoint’s internal/system columns. Select any columns you don’t want to migrate, right-click, and choose Remove columns.
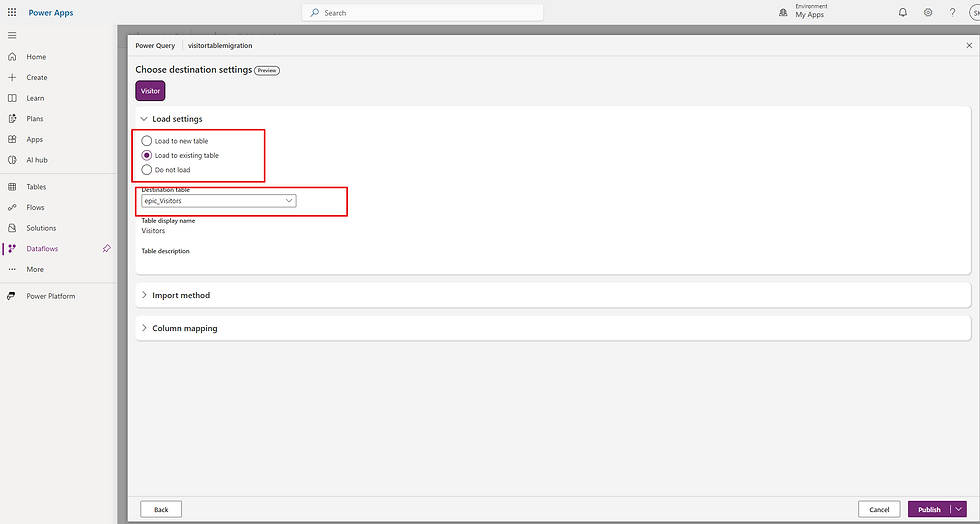
On the next screen (Choose destination settings), we’ll migrate to an existing table. Under Load settings, select Load to existing table and choose the table name. On the same screen, expand Column mapping.
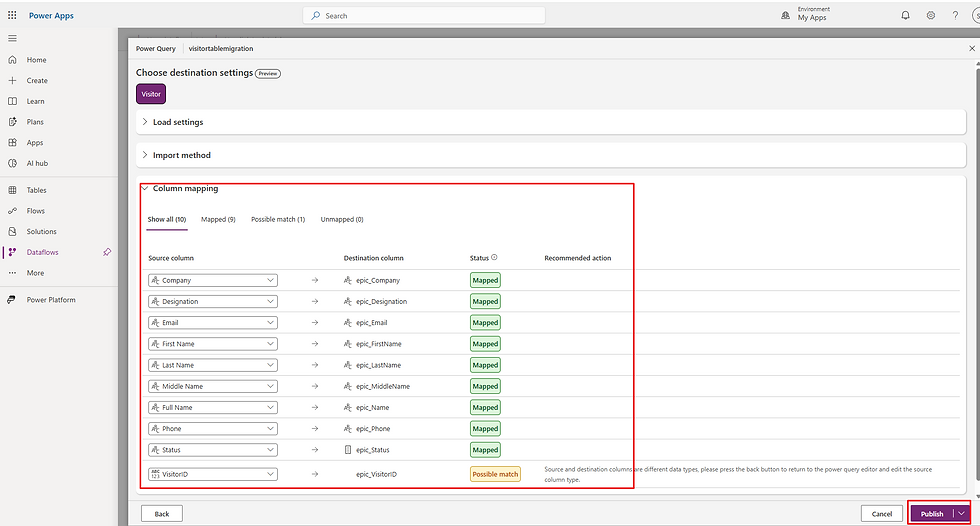
Column mapping automatically maps fields. Uncertain matches are shown under Possible match, and any missing ones appear under Unmapped. This helps you map large datasets quickly with minimal manual effort—just review and fix any mismatches before proceeding.
You’re all done. Finally, click Publish to start the migration process.
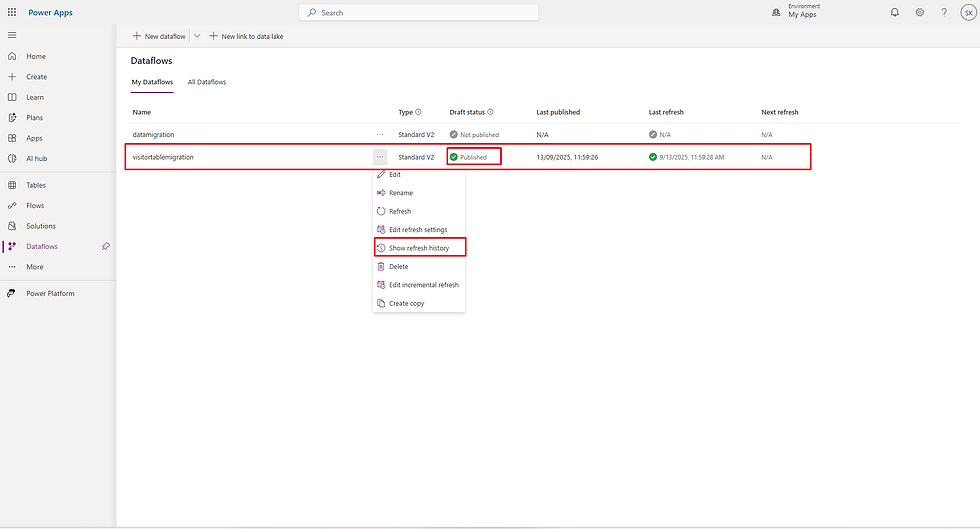
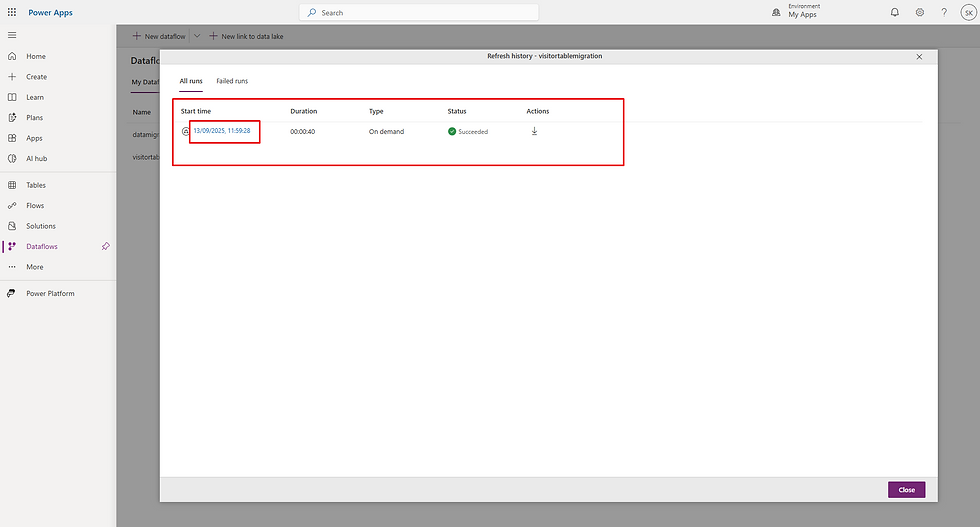
Monitor the progress: select the dataflow you created, click the three dots to open the menu, then choose Show refresh history, as shown in the picture below.
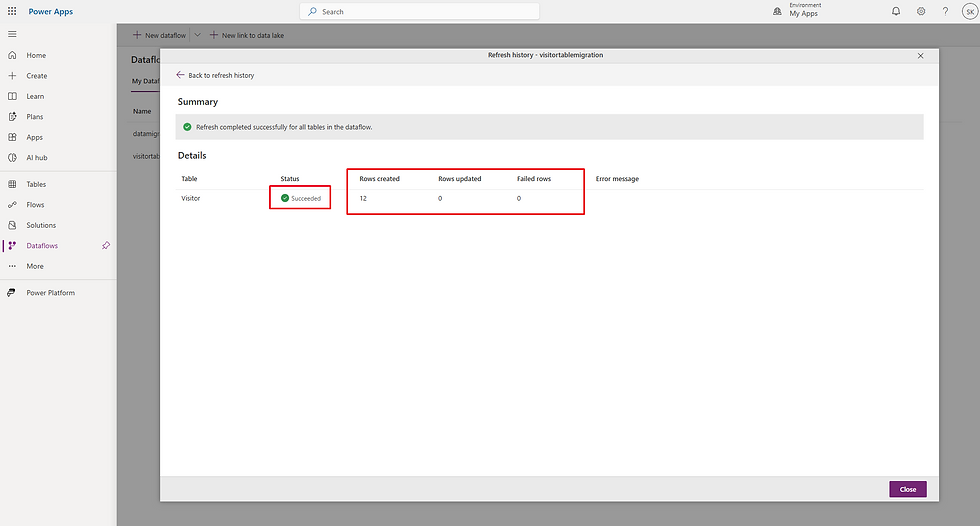
Click on the timestamp to view more details.
This is the basic migration process. Dataflows can’t migrate every column type, so we’ll use alternate approaches to handle those caveats. We’ll cover them in the next post. Some affected column types include: Image, Attachments,


Comments